DIY Corn Hole Game
This post may contain affiliate links. If you purchase through links on our site, we may earn a commission.
Happy Football Friday y’all! This week’s post has been a few weeks in the making but I’m so excited to share it now that it’s finished! My hubby and I have been hard at work making this DIY Corn Hole game set!
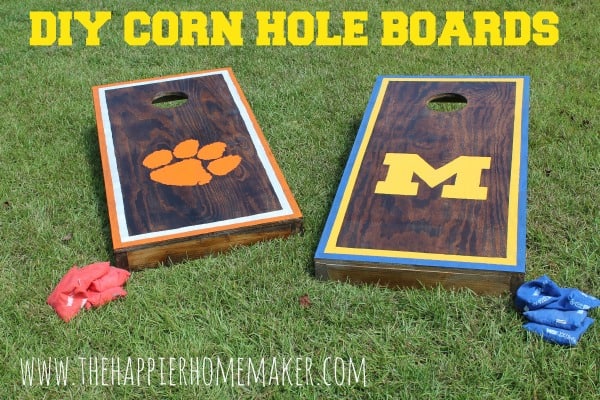
With the summer coming to a close we really wanted to have something to keep the family outside on the weekends once we close the pool. We decided to make these DIY Cornhold Boards and both my husband and myself and our boys have been getting a ton of use out of them!
How to Make DIY Cornhole Boards
Materials:
2– 2 x 4-foot sheet of ¾-inch plywood
3– 2 x 4 studs at 8 feet in length
4– 4-inch long 3/8-inch carriage bolts
4– 3/8-inch nuts
4– 3/8-inch lock nuts
8– 3/8-inch fender washers
box of 3 inch deck screws
6″ hole saw
3/4″ spade bit
drill
jigsaw
circular saw
Instructions:
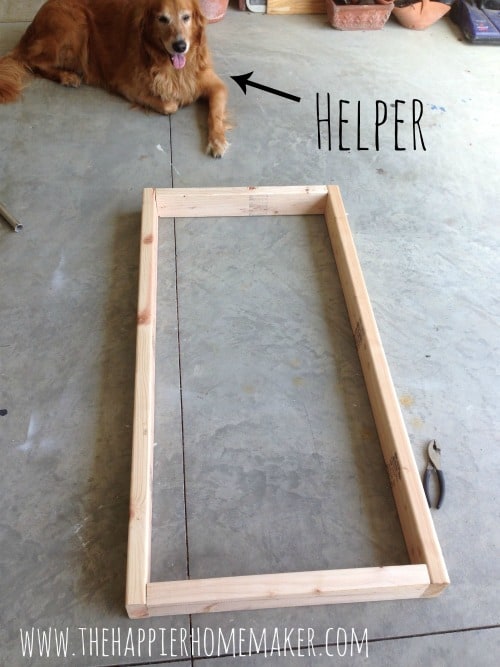
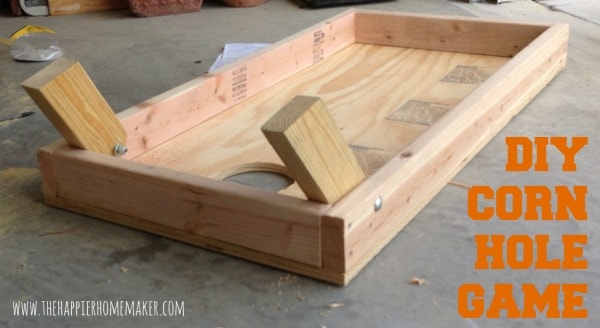
Cut the studs into (4) 4′ pieces to make the long sides of the cornhole frame and (4) 21″ pieces to make the short sides of the board frames. Position the 21″ wood section inside either 4′ piece to create your frame. Predrill pilot holes before using the 3″ screws to attach the pieces-this helps prevent the wood from splitting.
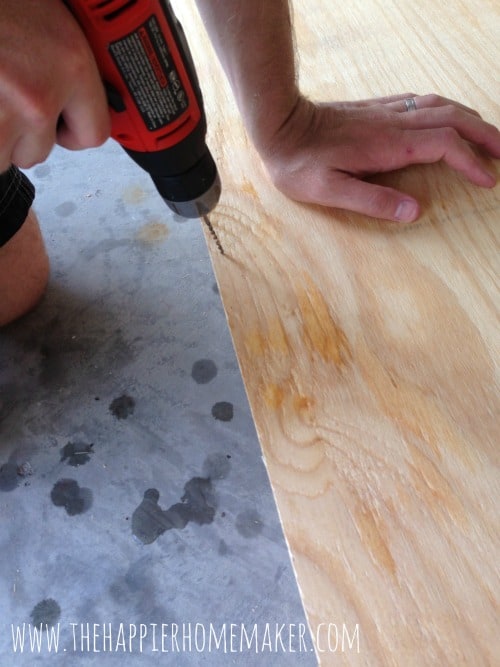
Attach the plywood to the top of each frame with screws, again pre-drilling the pilot holes. We used 8 screws total to attach the top-one centered along each short end and three on each long end-one at the center and the other two about 4″ from each end.
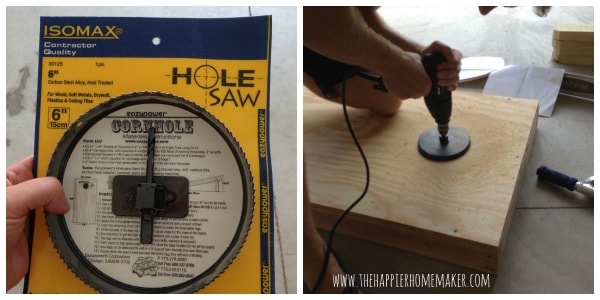
Next it’s time to drill the hole in the board. Measure to the middle of your board (12″ from each side) and 9″ down from the top and mark this spot. Center the bit on your hole saw on this mark and take your time with the saw to create your circle.
TIP-We found we had to use our corded drill for this part-the cordless drills didn’t have the power to get through the wood. My husband also found that loosening up then reapplying pressure as you drill helped as well.
To create the legs cut (2) 11″ long pieces of your 2 by 4 studs and miter one end to a 25-degree angle. Round the opposite end of the leg with a jigsaw, we used a roll of painter’s tape to trace a semi-circle on the wood to guide our cut. Sand the rounded end until smooth-the rounded portion allows the legs to fold in when the board isn’t in use.

Measure to the center of the rounded end and drill a hole with your spade bit. Our hole was just over an inch from the top of the rounded end. The game is supposed to sit 12″ off the ground at it’s highest point so we mocked ours up to figure exactly where to drill the hole to get the proper height with the legs fully extended. By doing this you can mark the appropriate spot on the framed board as well and drill a coordinating hole on the frame with the spade bit also.
After all the holes are drilled line up your legs and board and push your bolt through, attaching with the fender washer, nut, and lock nut on the interior.
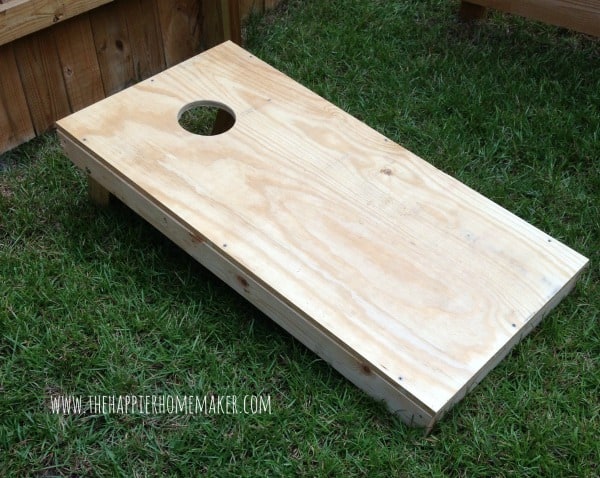
At this point the board is finished. We actually kept it like this two weeks before I finally motivated to paint it (hey-it’s just as fun to play on a naked board right?!
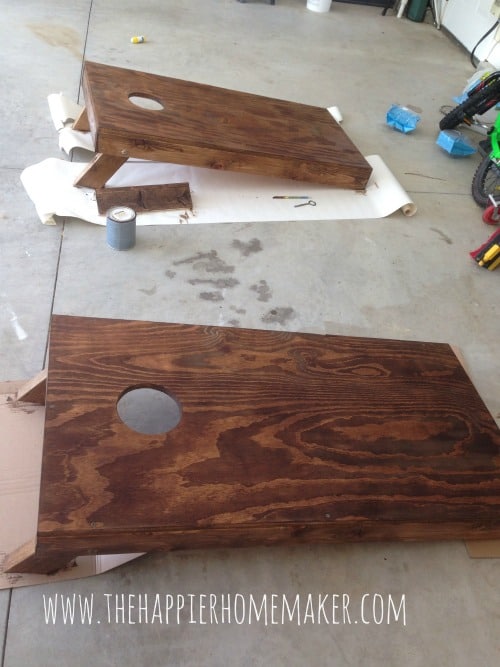
Once the motivation was there I got to work staining the boards-I first conditioned the wood with Minwax Prestain then used two coats of Minwax Polyshades in Mission Oak for my base.
We wanted one board for each of our schools so I found a Clemson Paw and Michigan Block M online and printed each out as a poster on four sheets of paper. I taped the poster together and rubbed pencil on the back of the sheet to “fake” carbon paper then traced the design on the boards. I painted them with regular old craft store acrylic paint-it took about 3 coats to get the opacity I wanted.
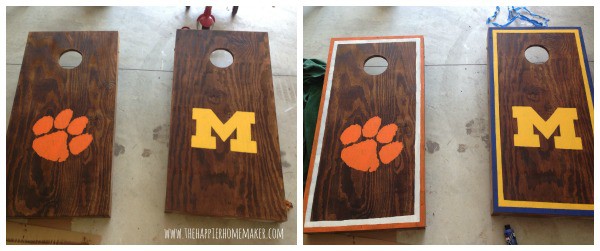
After this step I was very ready to be finished but I knew they’d look so much better with coordinating stripes around the outer edges so I went for it. On the Michigan board I used painter’s tape to create the border, on the Clemson board I hand painted them with a cheap foam brush. You can see that neither turned out perfect but I think the hand painted version was slightly better and you can’t see the imperfections unless you’re examining the boards very closely.
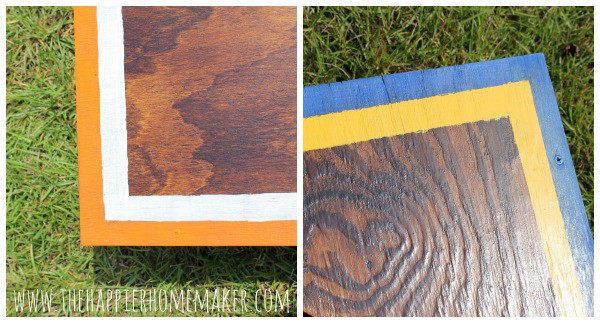
I finished up the process with 6 coats of Rustoleum Ultimate Polyeurethane in Satin because I wanted a super smooth and glossy finish.
I decided not to make my own corn hole bags because at this point I was about done with the DIY process-the finishing portion took SO much longer than actually building the boards! I found a pack of red and blue bean bags at our local Dicks Sporting Goods but to me the red looked more orange so I figured it would work!
While the entire process took a bit of time (mostly just to finish it-the building took about two hours tops) I love that I got exactly what I wanted and saved a ton of money. I think we paid ballpark $80 for all of our supplies (I had the stain, poly, and paint on hand already) rather than the $200 I had seen boards selling for so it was a good deal!

Do you play corn hole? We had never heard of it until recently but it’s a fun way to pass the time and get some fresh air!


Hey I saw the rustoleum polyurethane you used was satin. But the link posted takes you the rustoleum polyurethane in gloss. I just wanted to verify if it was satin or gloss that you used? Thank you 🙂
Where do the extra 4 fender washers go? Your materials list said to get 8 but your instructions only referenced 4.
My husband and I just made our own set from your directions and it was a fun project to do together! I’m making my own bags as well…about to go fill them up with corn and finish them up. Thanks for posting your how-to. It was very easy to follow.
How has the paint held up with use of the boards? Did the polyethylene make it too slippery for the bags?
The paint has held up great two years later Stacey! The boards are very smooth from the poly but it doesn’t affect play at all!
So your dimensions are 48X21 correct?
48×24
2 pieces cut at 48”
2 pieces cut at 21”
2×4 are 1 1/2”
48 long sides with the 21” pieces in between at top and bottom(making a rectangle). So the overall measurements from corner to corner are 48×24
Hi there, I’m wanting to make a Clemson set. However, I’m having trouble finding a Tiger paw template. I noticed you printed yours out poster size. How did you do this?
I just found a Clemson image file with Google image search and opened it in preview, then as a pdf. Then I pushed print and in the page setup printed it as a poster on 4 pieces of paper. Hope that helps!
I am rather inexperienced with any sort of handy work so I apologize if this is a stupid question but In order for the frame to match up with the plywood wouldn’t the inside short pieces need be 20″ instead of 21″? Confused..
Hey Amber! While the wood is labeled 2 by 4 it’s actually a bit smaller than that due to the milling process so that’s why it seems like the numbers don’t add up! Kindof silly they label it like that right?!
How much did the materials cost?
I believe our wood was about $30-35 and then we chose to purchase the hole saw for $20. All the other materials we had on hand. If you didn’t want to get the hole saw to save on the costs you could use a jigsaw to cut out the hole, it just may not be as smooth a circle. Hope that helps!
You didn’t address the beanbags. What size; how heavy; filled with dry beans or what?
I mentioned in the post I purchased mine at a local sporting goods store but you can easily make your own sewing 6″ squares and filling with 15 oz of feed corn!
I made this yesterday using your instructions. Excellent post. Mine turned out great. The only thing I did different was use a jigsaw to cut the hole. Thanks for the great instructions.
Yay Tina! I’m so glad! I actually just pulled my jigsaw out yesterday for the first time in a couple years and wondered to myself if I should have tried that first.
I just made this yesterday 🙂 the boards lol great and I stained them with some stuff we had laying around. It took me aboutI thirty minutes to cut the wood and screw it all together. I paid 2.96 per 2×4 but I found that I needed four pieces of lumber to finish the whole project. We used a jigsaw to cut the holes because $35 for the drill bit was a bit too much for me 🙂 it still looks great though! Total amount invested is about $40. Lowe’s also had pre cut plywood which was fantastic! We just need to finish attaching the legs but I do have a question… do you butt the legs against the plywood itself or is it not touching at all? The 25 degree angle didn’t work if you try to put the legs straight up against the plywood. Awesome tutorial though! Way cheaper than buying a set, that’s for sure!
Thanks 🙂
They turned out fantastic!! Love the stain you used. 🙂
Thank Megan! That is my absolute favorite stain!
Awesome tutorial! I have to share this!!!
Thanks Jacque 😉
I love corn hole! I am going to make my husband build us a set!
You rock! That is all.