DIY Bathroom Mirror Frame with Molding
This post may contain affiliate links. If you purchase through links on our site, we may earn a commission.
Making a DIY Mirror Frame is easier than you think! With just a few supplies and some molding from the hardware store you can upgrade your builder grade mirror in one day!
My husband and I have been hard at work transforming our master bathroom into the vision we had when we first built the house. I recently shared how we painted the room and put up a gorgeous custom roman shade-it made a huge difference in the feel of the room but the next thing on our list was to frame out the mirror. I love the look of wood framed bathroom mirrors and it was a very easy DIY!
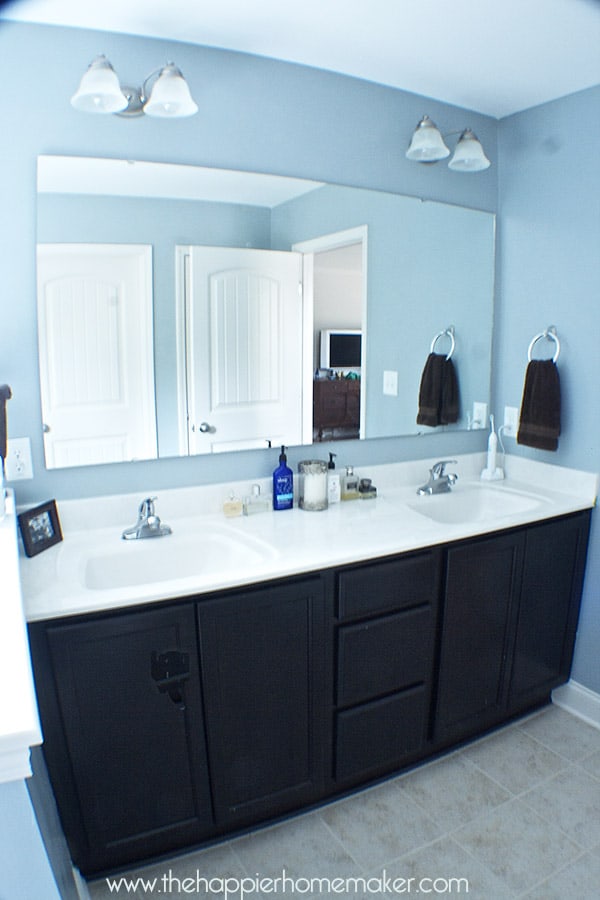
Here is the mirror before we added the mirror frame:
I debated getting a ready-made mirror frame kit but I’m too cheap frugal so we decided to DIY it. (of course)
How to Frame a Bathroom Mirror
We bought three 8′ sections of basic molding at the hardware store for less than $40. My husband measured our mirror and cut the molding into four pieces using the miter saw set at a 45-degree angle. (We used a simple miter box which was less than $15 to make the cuts)
We wanted the molding to match the cabinets so we decided to try Oil Rubbed Bronze spray paint. Be sure to paint both the back and front as you’ll see a little of the reflection of the back once you have your DIY mirror frame up.
Once we had prepared the molding we were ready to put the DIY Mirror Frame up. We had mirror mastic as I had seen recommended on other blogs but it was not holding the frame at all. I tried to tape the frame in place as well but-nope-still wasn’t working. So I poured myself a glass of wine and got to googling!
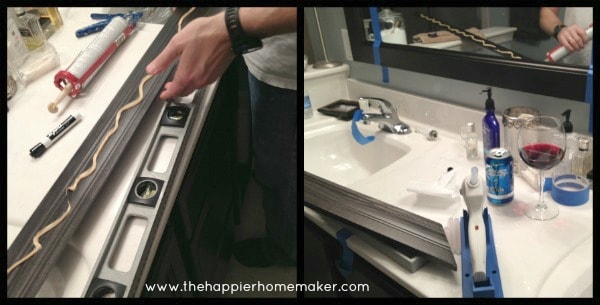
The glue gun worked fabulously to hold the molding in place so the mastic could dry. My husband would apply the mastic to the back of the molding then I would quickly put hot glue at the corners and at intervals along the length (being careful to get neither too close to the edge) and he would put the molding up quickly before the hot glue dried while I grabbed the level to check it…we were like a well-oiled machine and once we figured it out we had the entire thing up in 15 minutes!
We didn’t have to caulk the gaps but if your edges don’t match up perfectly you can apply paintable caulk and then paint it to match your molding.
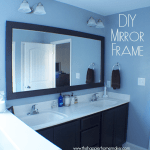
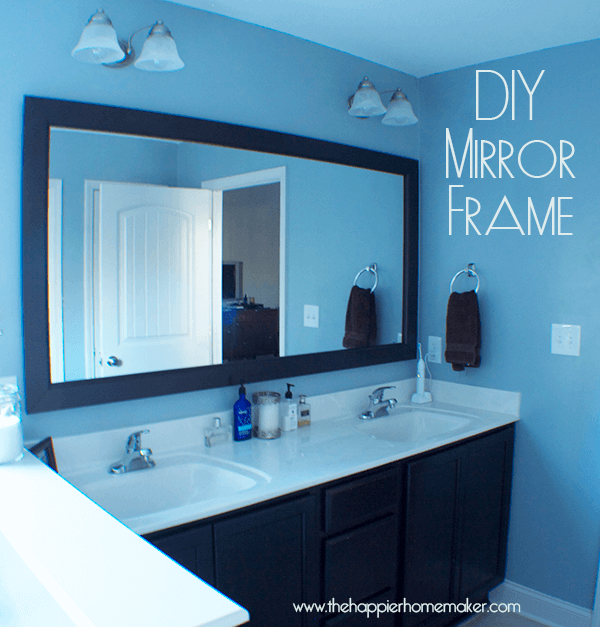
Here is the before and after, what a difference it made! I’m so glad we took the time to learn how to make a mirror frame!!

Have you framed out any mirrors in your home? I was so nervous to do this and kept putting it off but it was really so easy and inexpensive and made a huge impact!


Your site is overloaded with ads that make it unusable
I’m sorry if it is difficult to maneuver Fred, I try to be as non-intrusive as possible while still earning money to support the significant cost of maintaining this website and supporting my family. (Also most ads have a “close” or “X” to allow you to easily remove them from your screen for future reference.)
Very beautiful;))) I assume that your mirror was just regular/standard mirror=it isn’t a recessed medicine cabinet mirror. Is this correct? If it is indeed a non recessed medicine cabinet mirror…
By chance, does anyone know if you could apply the same GREAT method which was outlined in this blog post.
Please HELP & respond ASAP!!!
Thanks in advance for any help &/or assistance on this.
Can you do this project with a mirror that has a rounded/tapered or beveled edge? Thank you.
Cool!!! These wooden mirror frames are looking so stylish due to their elegant design and finishing. Customization also available at aarsunwoods.com
looks awesome! question though. Did any of your glue show on the refelction in the mirror? I did this and you can see some of the glue (I guess we got too close to the edge). Any idea for a fix for that?
I didn’t have the glue show through but the only thing I can think of to fix it would be to scrap it off with an Xacto knife or razor. Good luck!
WOW!!!! I can NOT get over the difference this made!!!! Just adding a simple frame to that mirror was night & day!!! You just inspired me to do the same for my bedroom! I have the same style mirror…and I always think that something is missing….now I know EXACTLY what it needs!!! I love your ideas! Thank you!!! 🙂
You’re very welcome Kristin, thanks so much for the sweet comment! ~Melissa